In the production of automotive displays, automated lighting measurements are standard. During development, however, a wide variety of measurements must be performed, usually in greater detail than in series production. The interaction of display control, measurement equipment and evaluation of the measured values is often time consuming and error prone. Fully or partially automated measurement, including evaluation and assessment of the measurement results, can significantly simplify the developer’s work here.
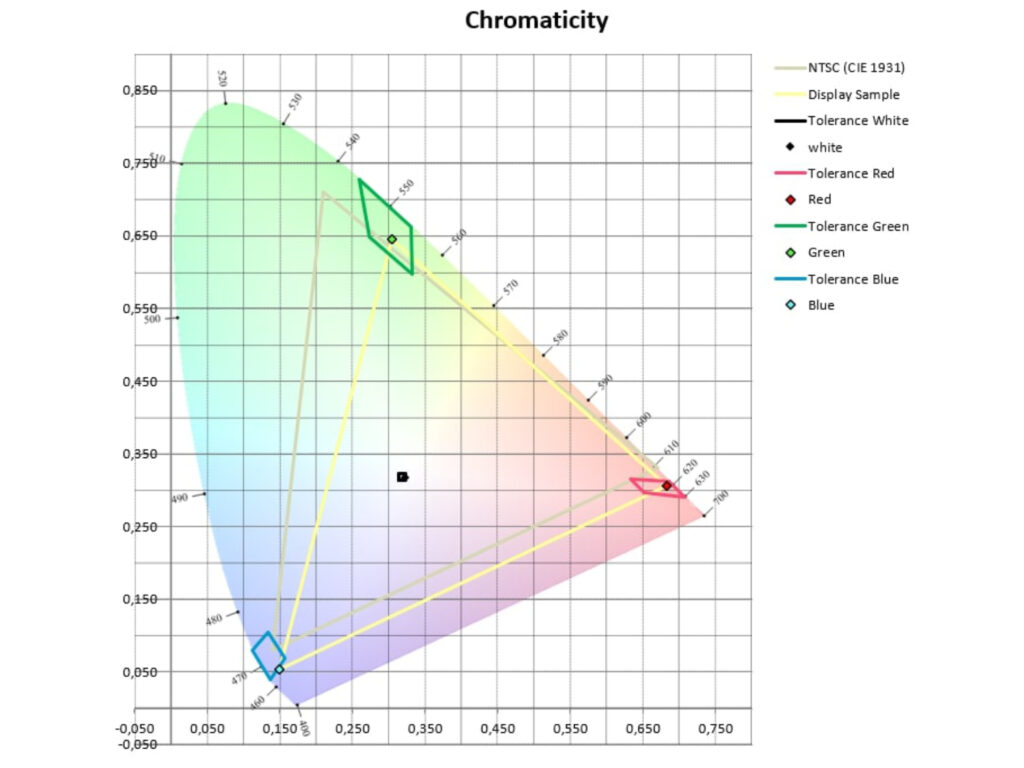
Both in the automotive sector and in other industries, it is important for displays to comply with the required technical lighting requirements. For this purpose, there are specifications that stipulate the required brightness, contrast and color values. These parameters must be verified, proven and approved in the development phases before series production begins. For this purpose, samples are measured in the appropriate configuration stages, deficiencies are uncovered, and after optimization and fulfillment of the requirements, they are transferred to the next development phase.
For the photometric measurements, there are several manufacturers of measurement equipment, such as luminance measurement cameras, spectrometers and spectrophotometers. These have been in use in many companies for years and are ideally suited to handle any measurement task. The measurement data is usually processed in individual software packages and can be transferred to common spreadsheet programs via export functions. In order to then evaluate the data with regard to their quality, these values must be compared with the customer’s requirements. This is usually done with the usual tools or macros that have to be specially programmed.
Mechanically, the camera must be arranged opposite the display to be measured in such a way that the standard-compliant alignment within the optical axis display/sensor is ensured. This is particularly essential for BlackMura measurement, which is widely used in the automotive industry. Here, an angular alignment of the display is required for a calculation of the homogeneity and the gradient. Depending on the shape of the housing, this can be a difficult and time-consuming task. Often it is not possible to position the display module with its design-defined housing shapes on a flat surface.
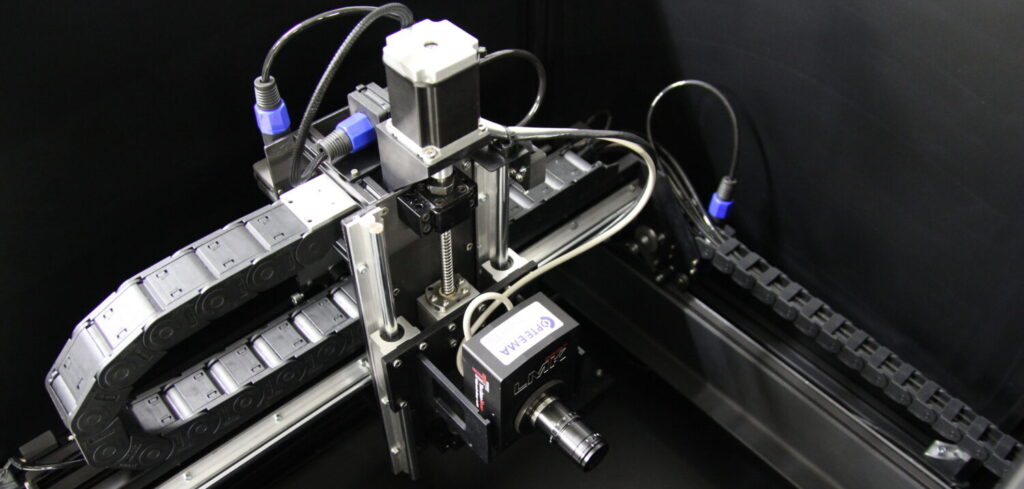
Also, for measurements with different lenses (e.g. conoscopy), the distance between the specimen and the measuring camera must be easy to change. This distance can be fully automatic or manually adjustable. A reproducible traversing unit based on a three-axis stage or a freely programmable robot arm is recommended here. These systems are also already available on the market in many variants, equipped with the established hardware and software interfaces.
In order to be able to carry out a reproducible and standard-compliant photometric measurement of a display, a large number of preparatory settings of the measuring system, the test specimen, as well as the downstream evaluation and documentation, are required, which makes such a measurement very complex and time-consuming.
SemsoTec has many years of experience in the measurement of displays in the automotive sector. Together with the development competence of mechanical systems as well as software solutions, it was possible to combine the individual components necessary for such a complex measurement task and to develop a fully automated measurement system, DAISY (Display Automated Inspection System). It is now in use in some lighting laboratories at OEMs. A simpler version is also used in SemsoTec’s production as a strip tester. A new revised system with robotic arm for the company’s light lab is in development.
The DAISY is a self-sufficient light lab that brings its own darkroom and can therefore be set up anywhere in normal office environments.
The measuring device, which can be a commercially available luminance measuring camera or a spectrophotometer, is mounted on the traversing unit and can be moved in all axes. The display is brought into the standard-compliant position either between adjustable jaws or via specific fixtures. Depending on the possibility, the display is controlled with the required test images manually (e.g. in the case of tablets or smartphones) or, in the case of CIDs or combination instruments, via the videosource also developed by SemsoTec.
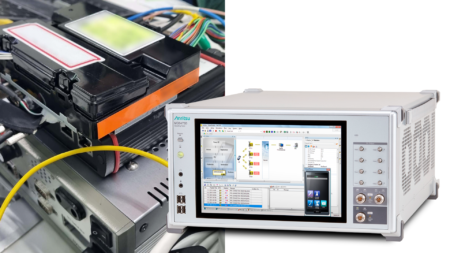
The DAISY software now takes care of controlling the display, moving the camera (focusing), setting the measurement parameters, triggering the measurement and saving the measurement data. A menu can be used to select the measurements to be performed and to save the sequence for later measurement tasks.
Afterwards the measurement can be evaluated. For this purpose, the software searches for the selected specification values from a database, compares the nominal values with the measured values and evaluates them, whether they are within or outside the specification. Finally, a measurement report is created in which all measurement parameters and results are documented.
In summary, DAISY is a fully equipped compact lighting laboratory that can be set up in a normal office environment. As a measurement system for photometric evaluation of displays, it performs all tasks, namely display control, measurement, evaluation and evaluation of displays, but also other illuminated displays through a clear and easy-to-use software.
